Skip to content
Calls answered 24/7Office Mon–Fri 8am–5pm
6717 4th Ave, Brooklyn, NY 11220718-439-1224
Commercial Laundry SolutionsNew York · Since 2001

Preventive Maintenance

Commercial washer & dryer preventive maintenance

Planned PM from a factory-trained team: real photos from our jobs, the checklists we work from, and what owners can do between visits.

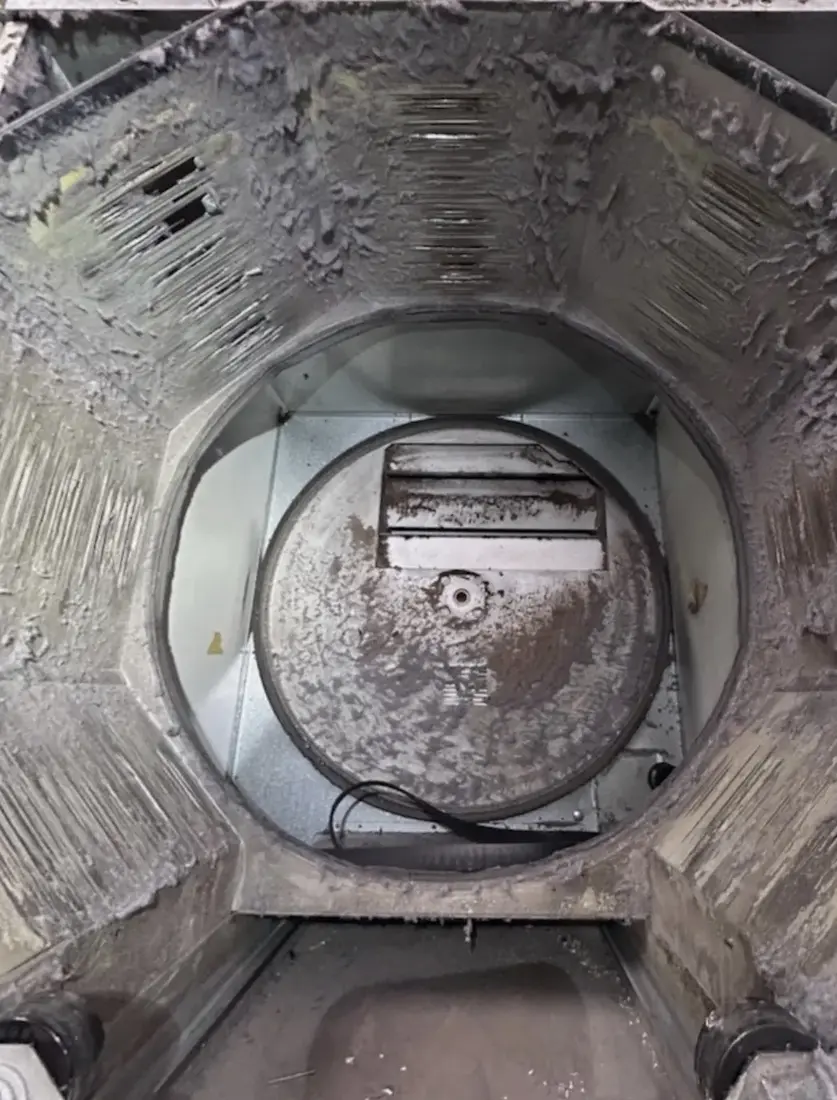
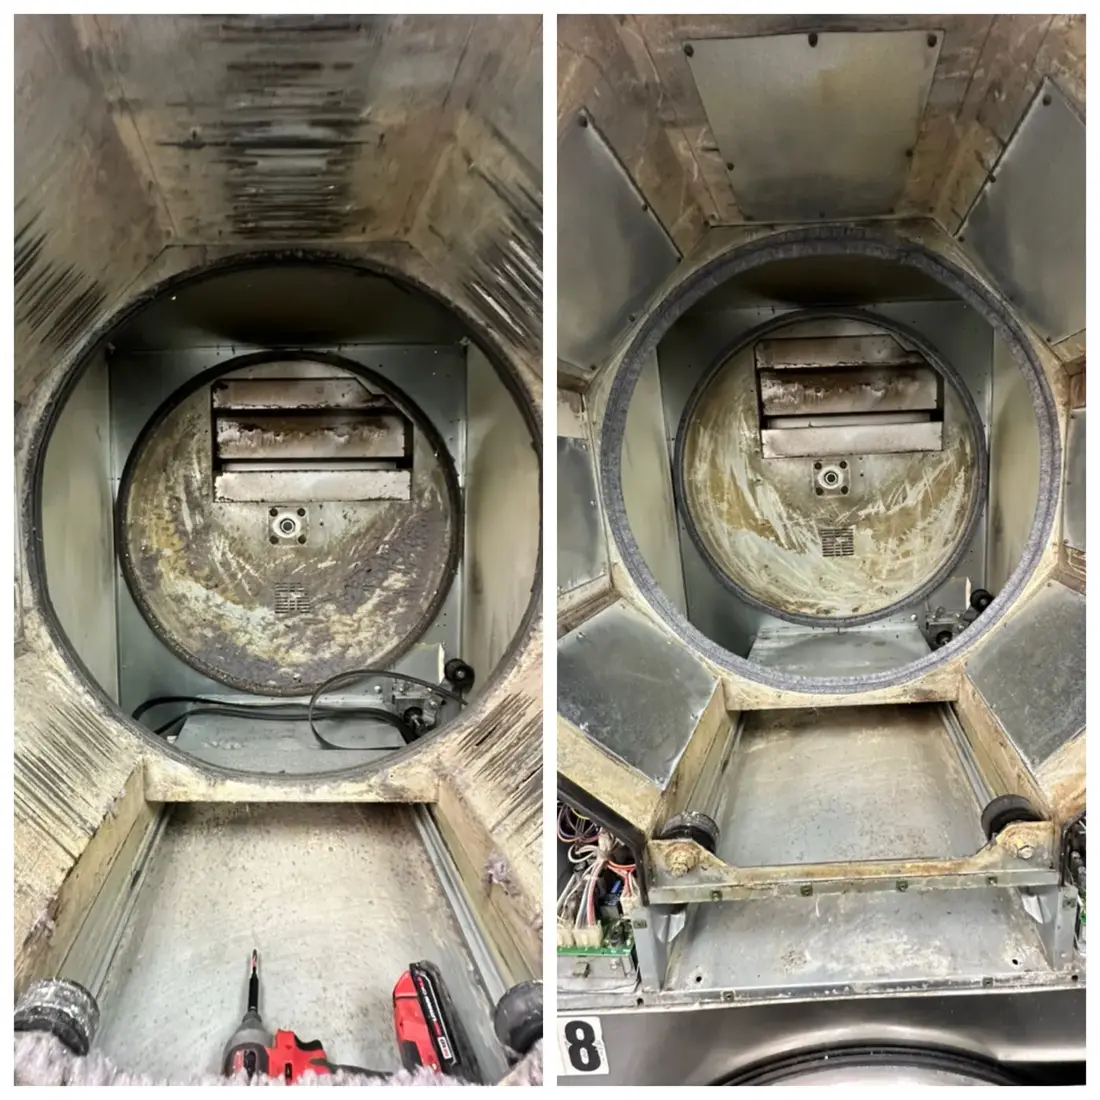
Inside of a stack dryer cabinet coated in lint before PM cleaning
Before
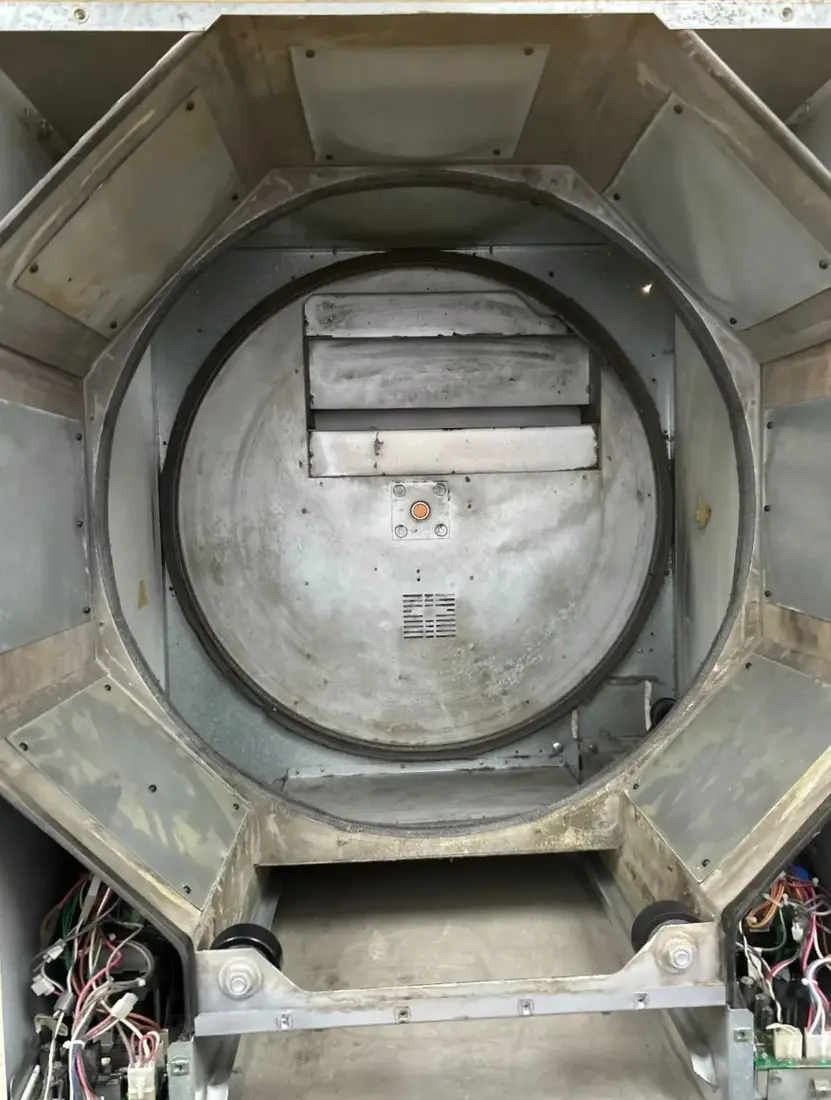
Same stack dryer cabinet after CLS cleaned it
After

Why PM

Most breakdowns start as small problems

A torn cylinder seal, a lint-packed blower wheel or a loose anchor bolt doesn't stop a machine on day one. It slowly adds drying time, gas cost and wear until something fails, usually on your busiest day. Preventive maintenance finds those problems while they are still cheap to fix.

  • Shorter dry times and lower gas bills
  • Lower fire risk from hidden lint
  • Fewer emergency calls and out-of-order machines
  • Longer life for bearings, motors and drives
  • A written record of every machine's condition

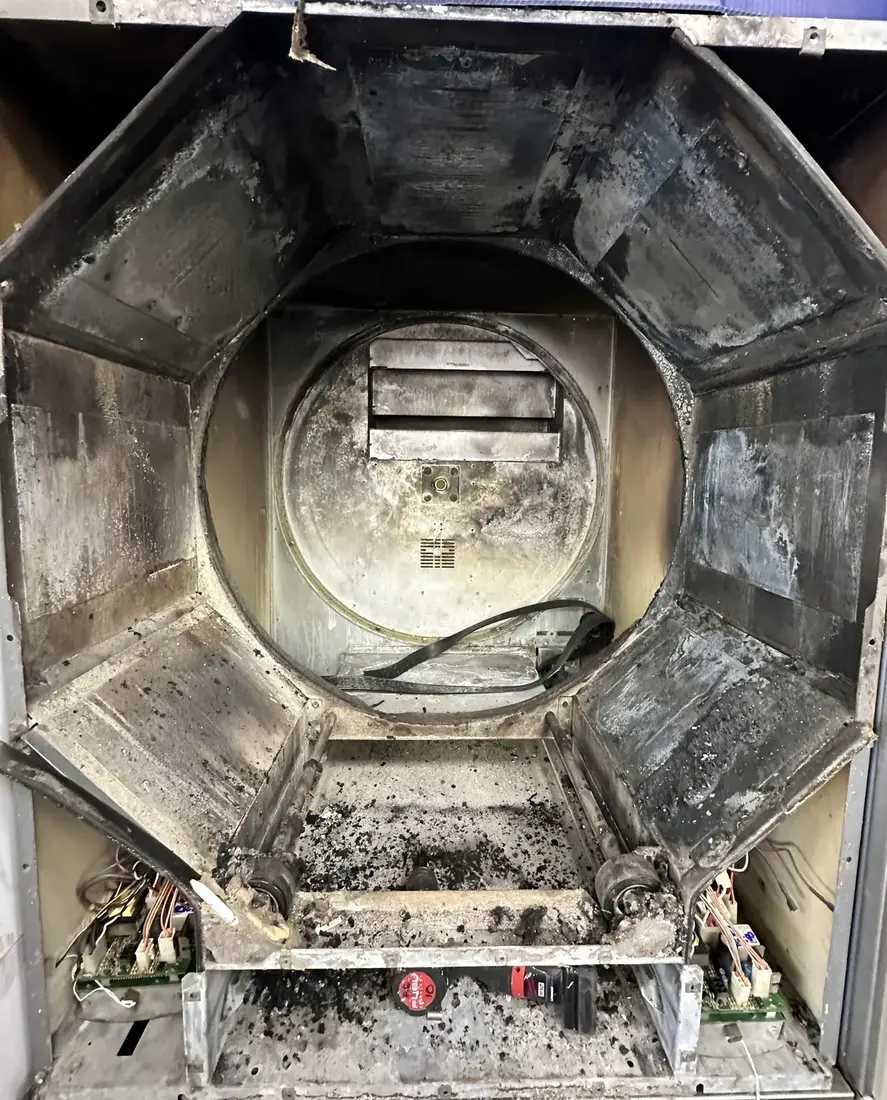
This dryer is a typical example. From the front it looked fine. With the cylinder pulled, the cabinet walls, shrouds and rear panel were coated in lint. That lint sits a few inches from the burner.

From the field

Dryer cylinder-out deep clean and shroud replacement

Commercial dryers come with two cabinet styles, and each one is repaired differently. Dryers with round shrouds get new shrouds. Octagonal cabinets have no replaceable shrouds, so we close off burned-out cuts with rectangular sheet metal pieces. Both repairs make the air pass through the drum instead of around it.

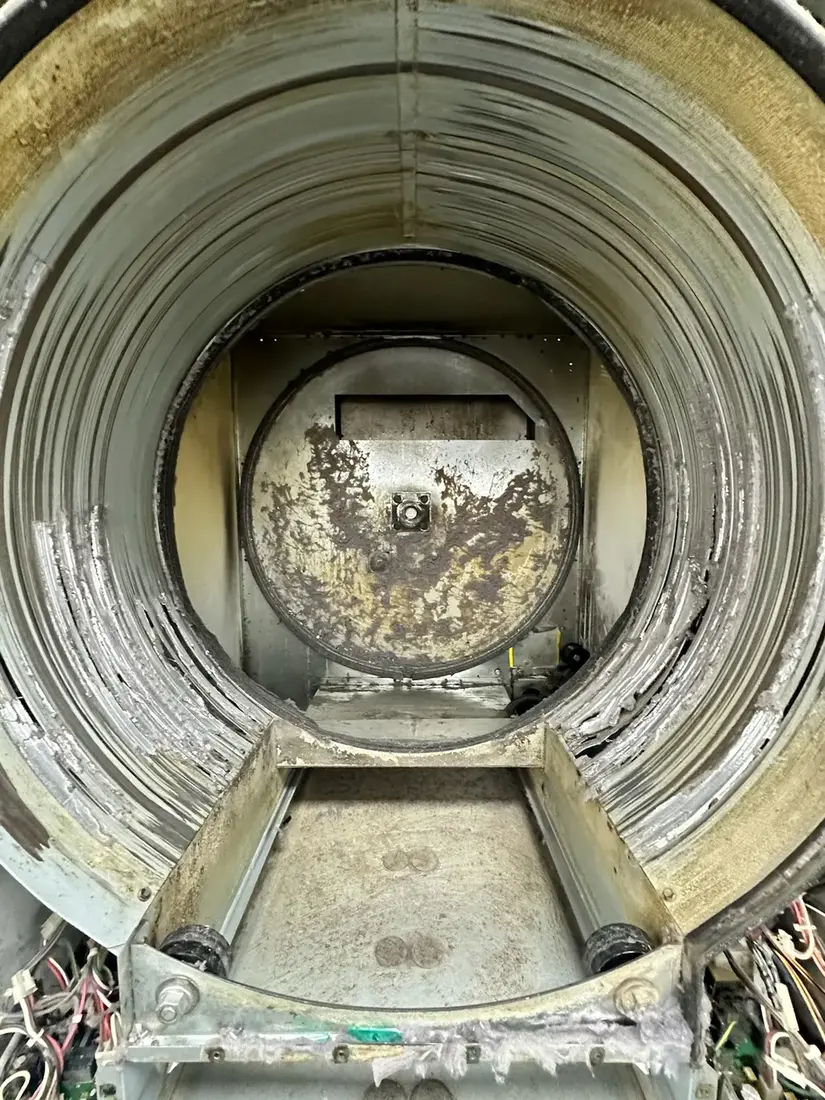
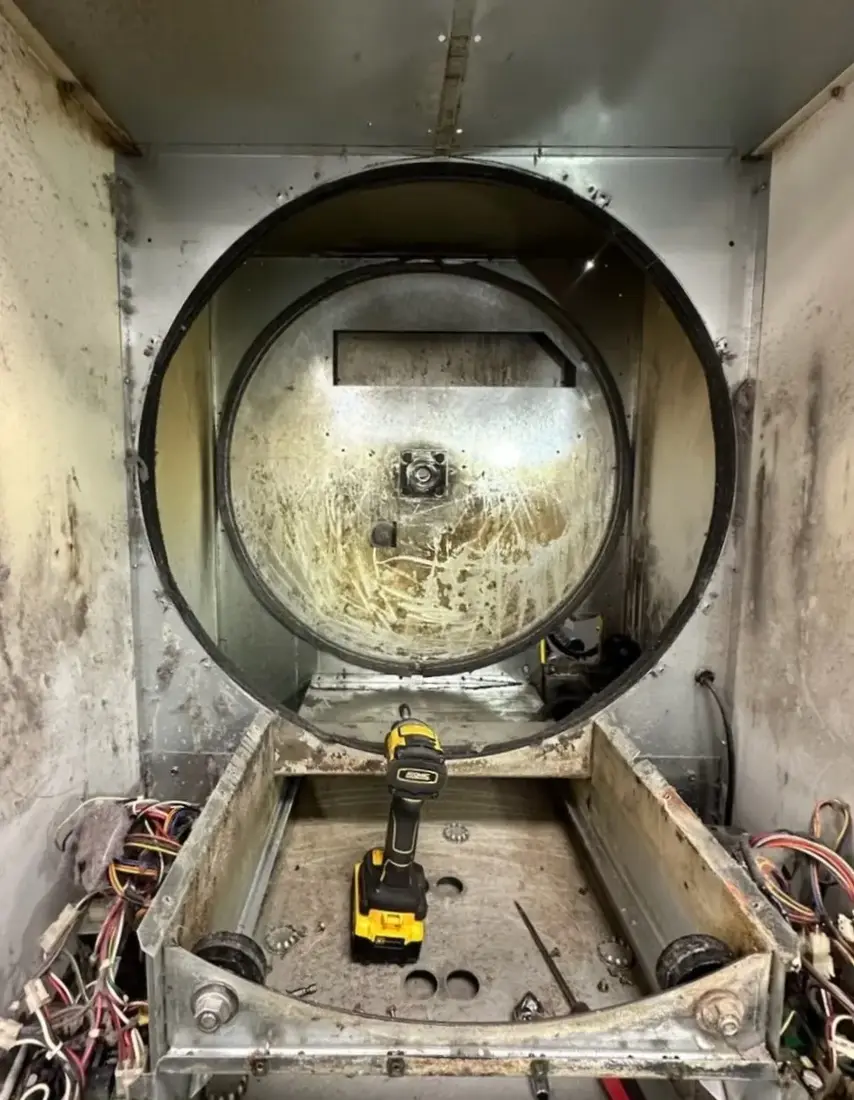
  1. Round dryer shrouds heat-damaged and coated in lint with the cylinder removed
    InspectionRound-shroud dryer with the cylinder removed. The shrouds are heat-damaged and coated in lint.
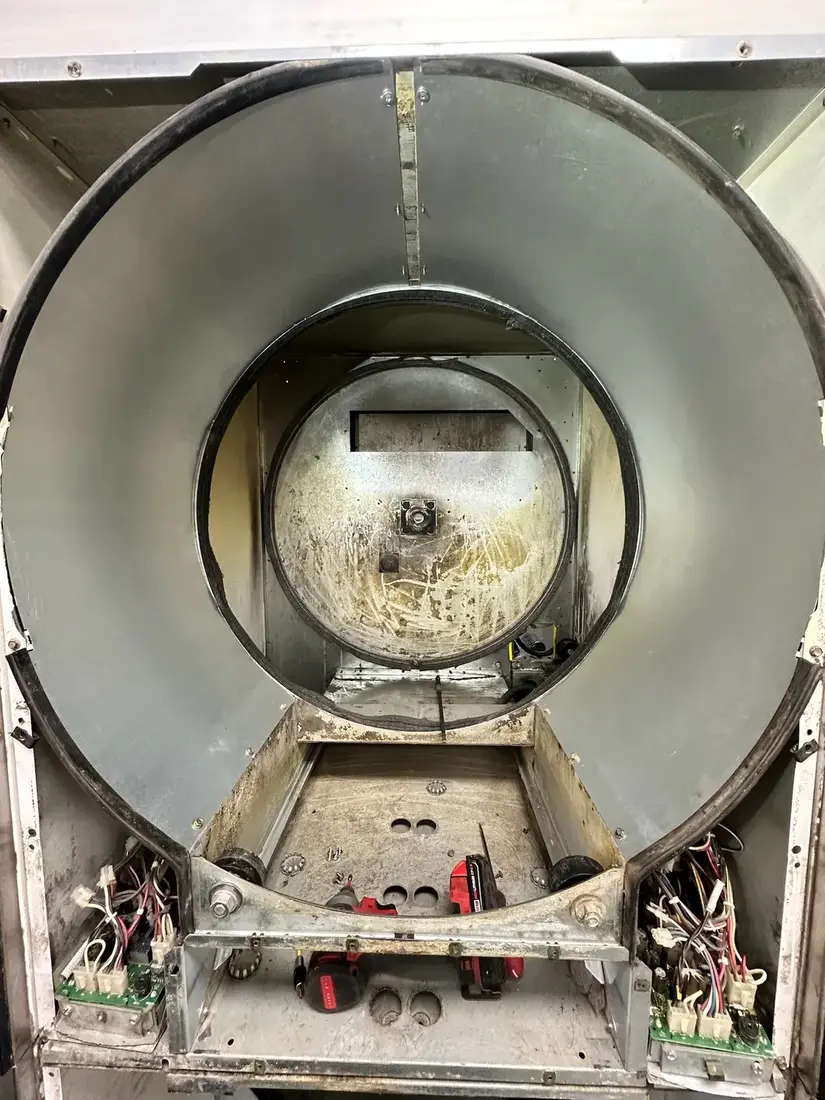
  2. Dryer cabinet with damaged shroud panels removed
    Strip and cleanDamaged shrouds come out and the cabinet is vacuumed and cleaned down to bare metal.
  3. New round shrouds installed in a commercial dryer cabinet
    New shroudsNew round shrouds are fitted so air is forced through the drum, not around it.
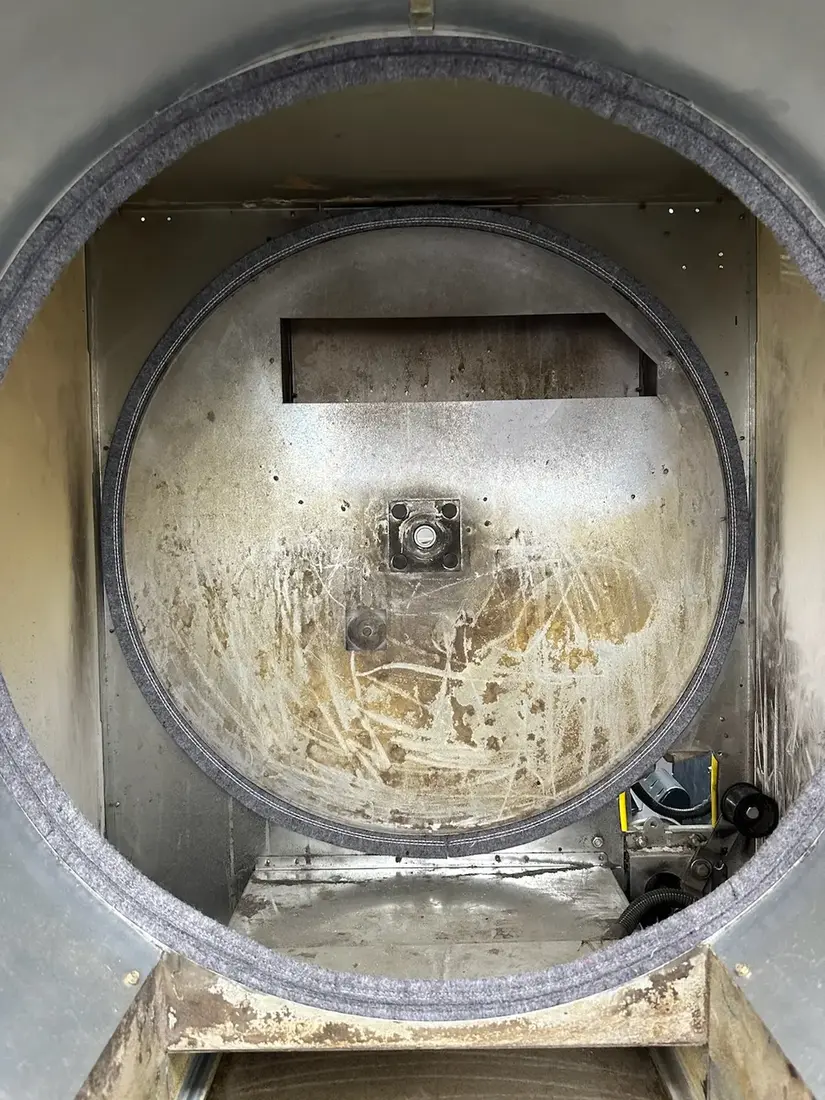
  4. New fire gasket and cylinder seal installed on the rear panel of a dryer
    Seals and fire gasketNew fire gasket and cylinder seal on the rear panel, then the cylinder goes back in.

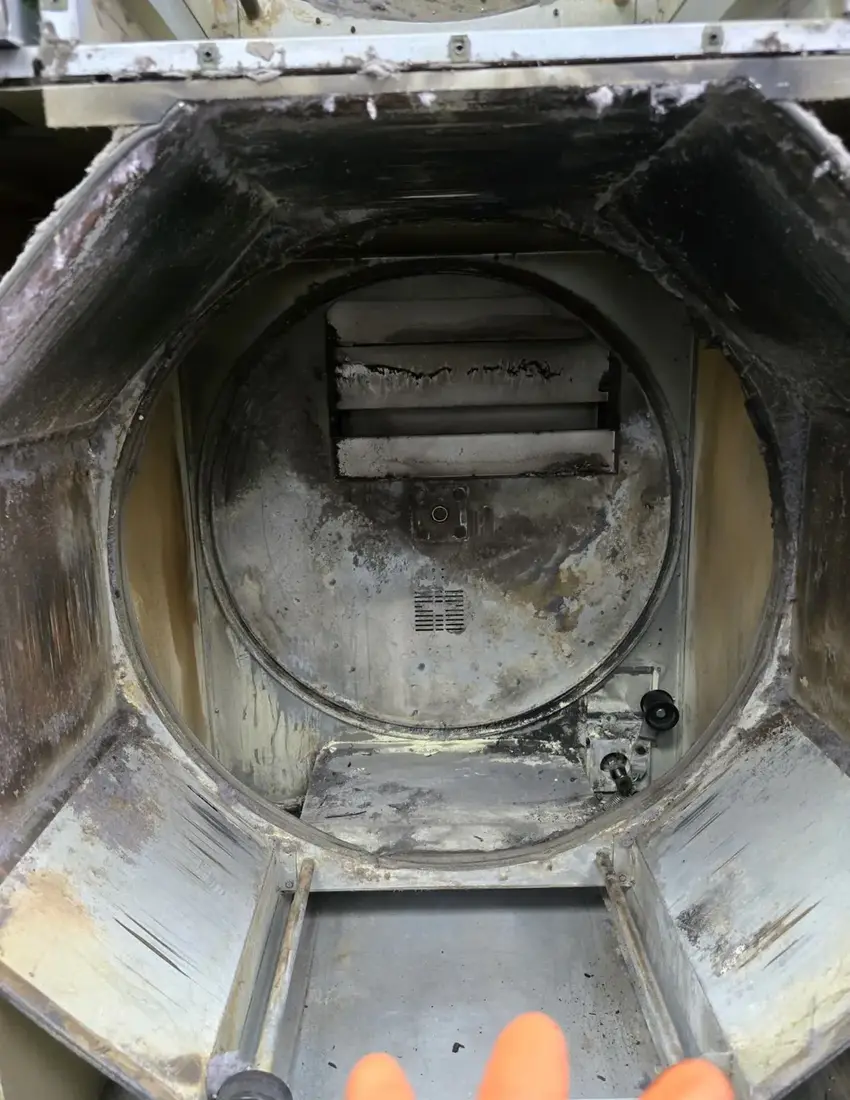
Octagonal cabinets: sheet metal patch pieces

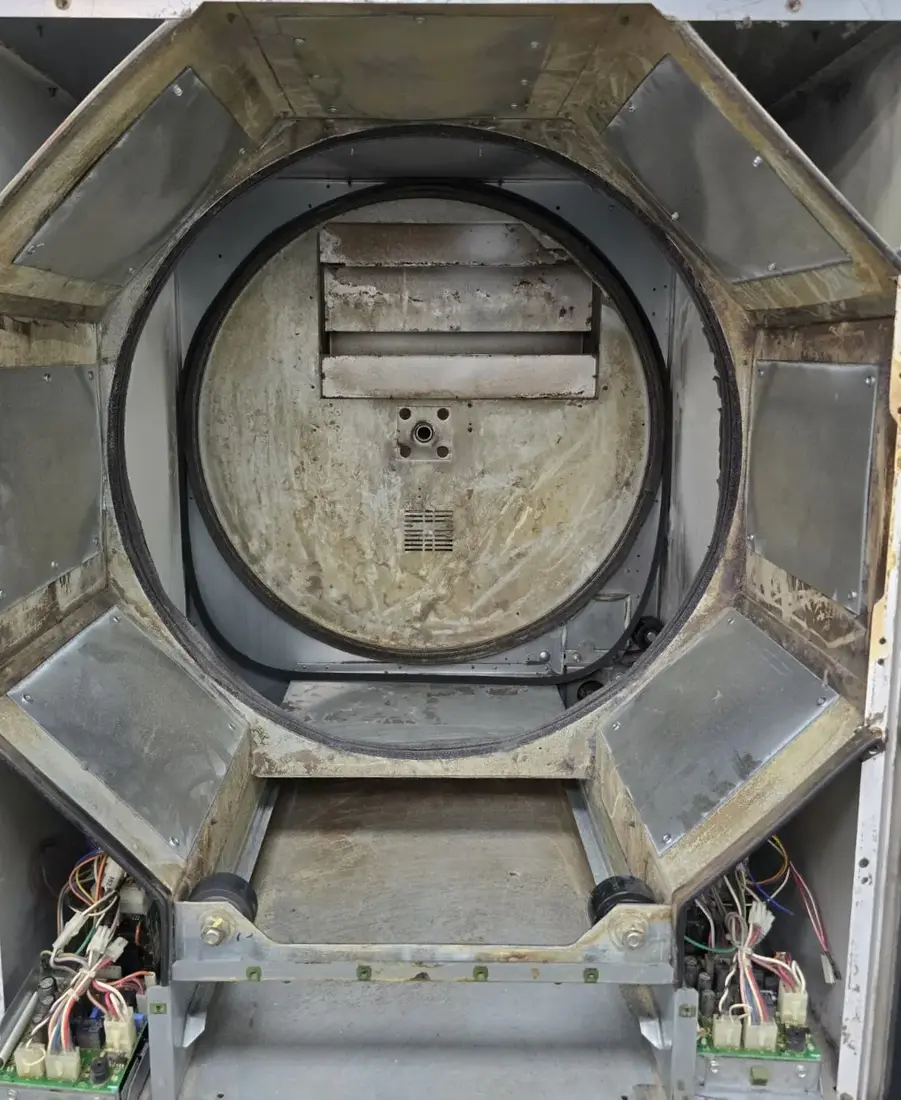
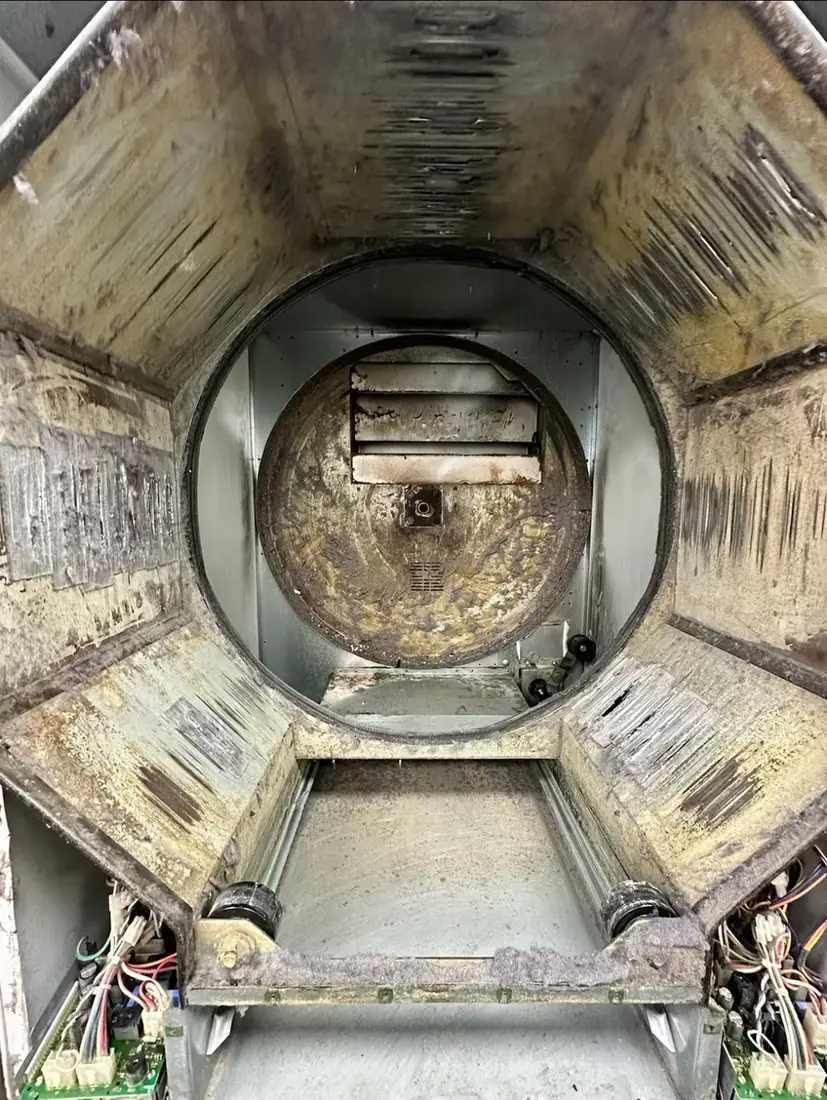
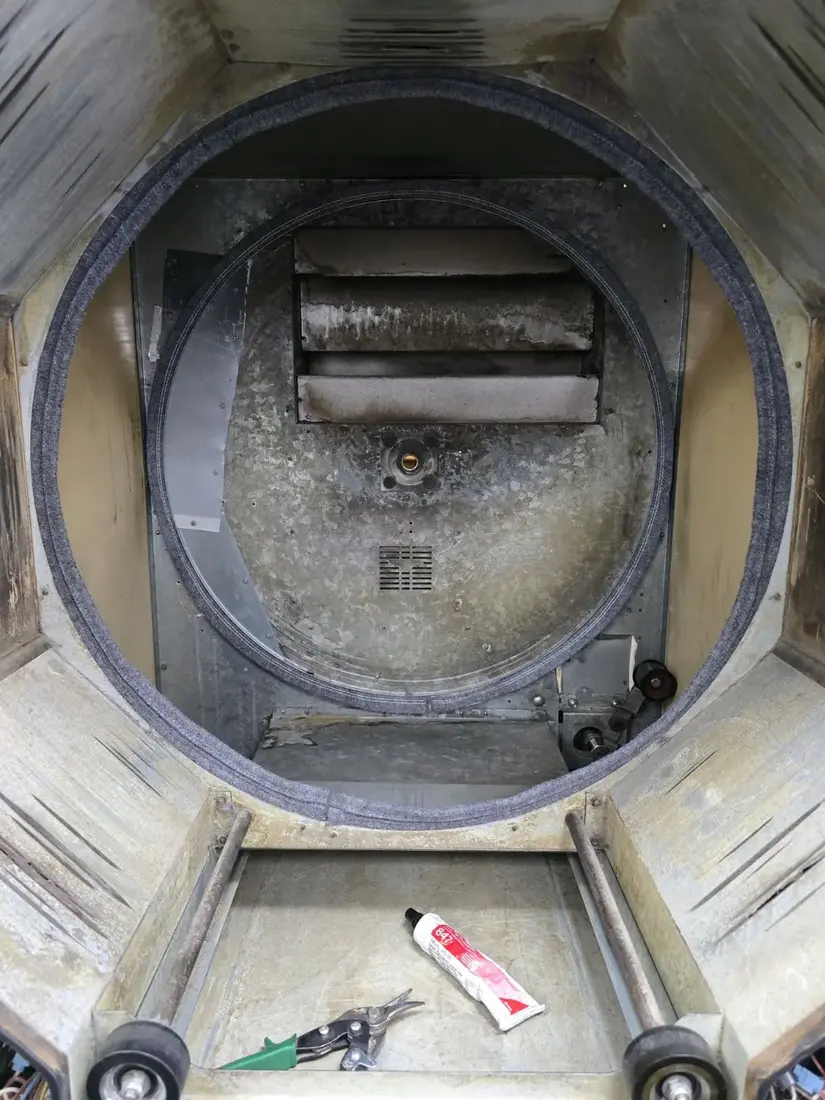
This octagonal-cabinet dryer had lint-caked, burned-through cuts in the cabinet panels. After a full cleaning we installed rectangular sheet metal pieces to close off the cuts.

Octagonal dryer cabinet with lint-caked, burned-through cuts before repair
Before
Octagonal dryer cabinet after cleaning with sheet metal pieces closing off the cuts
After

From the field

Worn cylinder seals and rear seal support

Long dry times and lint inside the cabinet pointed to worn cylinder seals. The rear seal support ring was also bent, so a new seal alone would not have sealed. We replaced the support, then the front and rear seals.

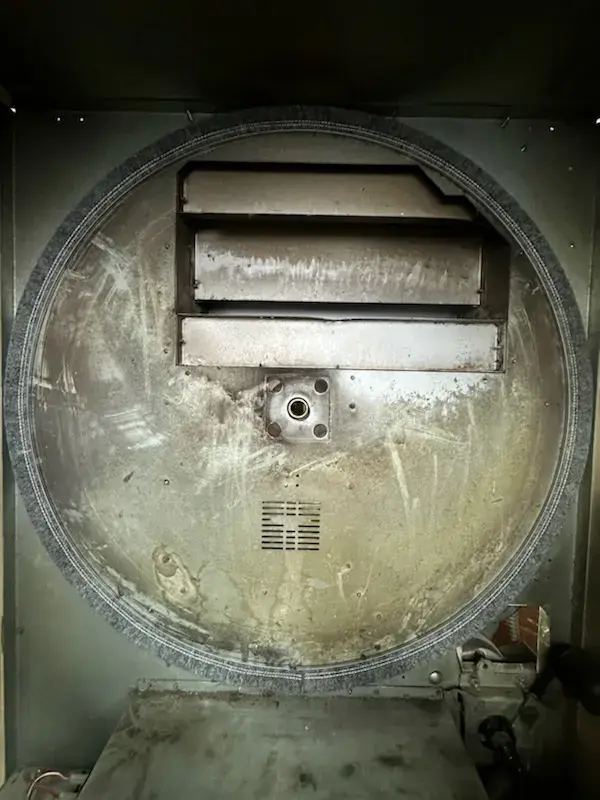
  1. Commercial dryer with cylinder removed showing worn cylinder seals
    BeforeLint drawn into the cabinet past worn seals.
  2. Worn rear cylinder seal on a commercial dryer rear panel
    Worn rear sealFlattened, torn seal on the rear panel lets hot air bypass the drum.
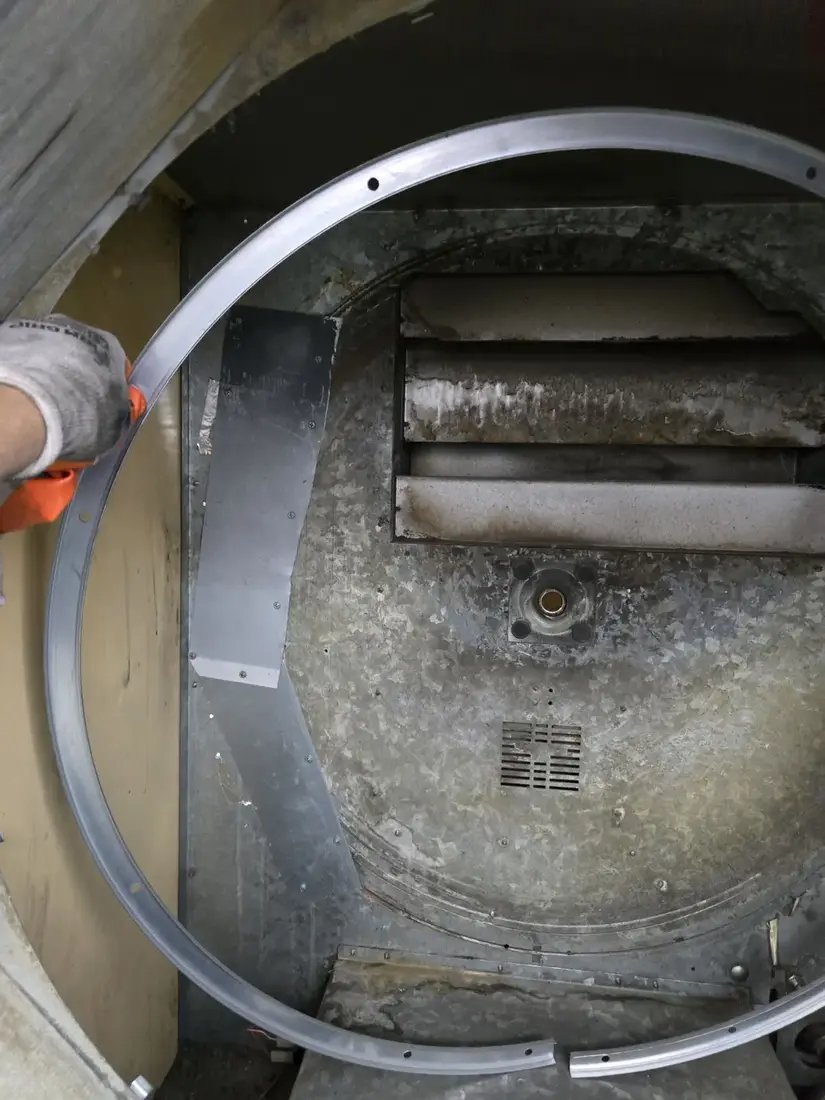
  3. Technician removing a bent rear cylinder seal support ring
    Seal support removedThe bent rear seal support ring comes off for replacement.
  4. New rear cylinder seal support ring installed in a dryer
    New supportNew support ring installed and the rear panel cleaned.
  5. New center and rear cylinder seals installed in a commercial dryer
    New sealsFresh center and rear cylinder seals before the drum goes back in.
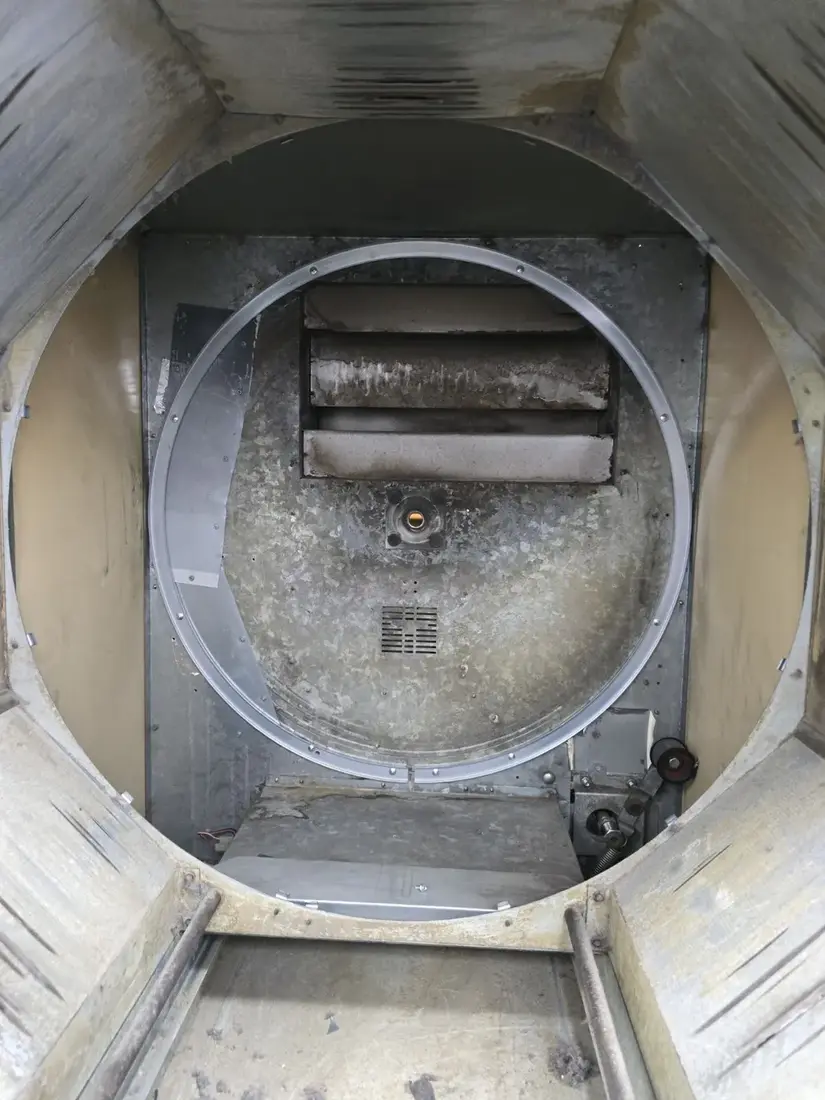
  6. Clean octagonal dryer cabinet with new seals and sheet metal pieces, ready for the cylinder
    Ready to reassembleClean cabinet, new seals and sheet metal pieces over the cabinet cuts, ready for the cylinder and a test run.

From the field

Blower wheel, motor and exhaust cleaning

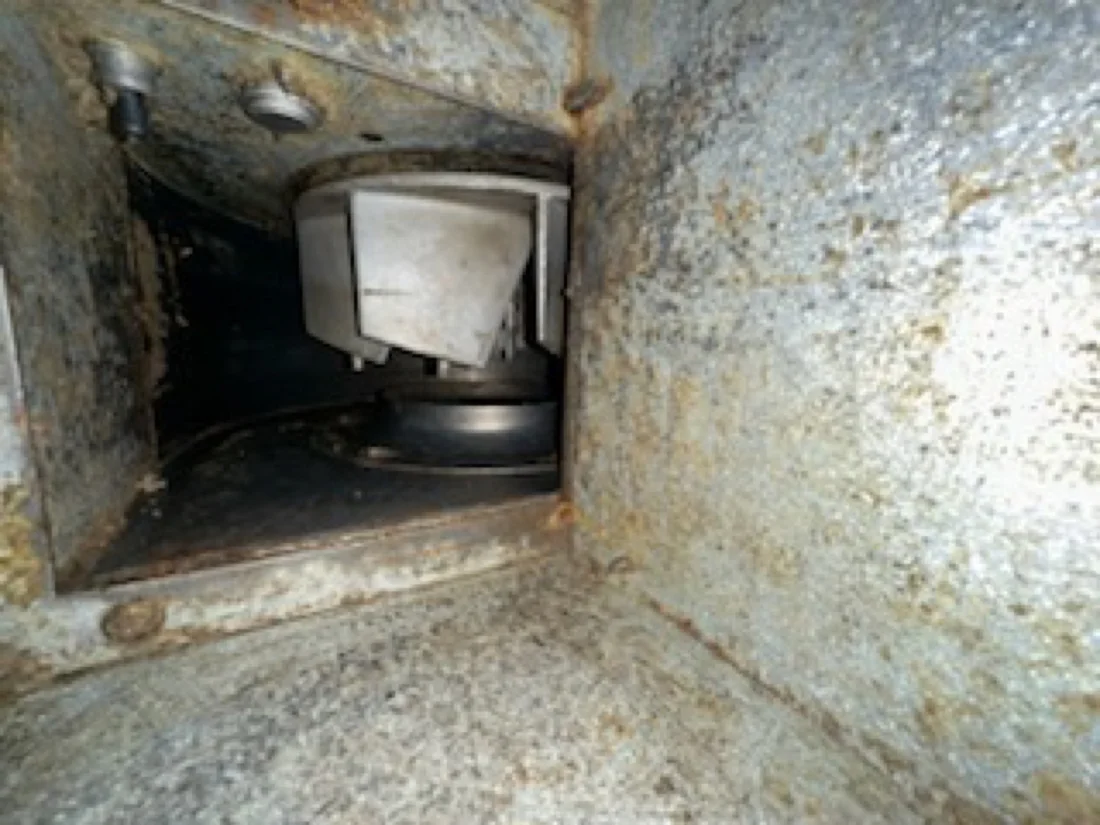
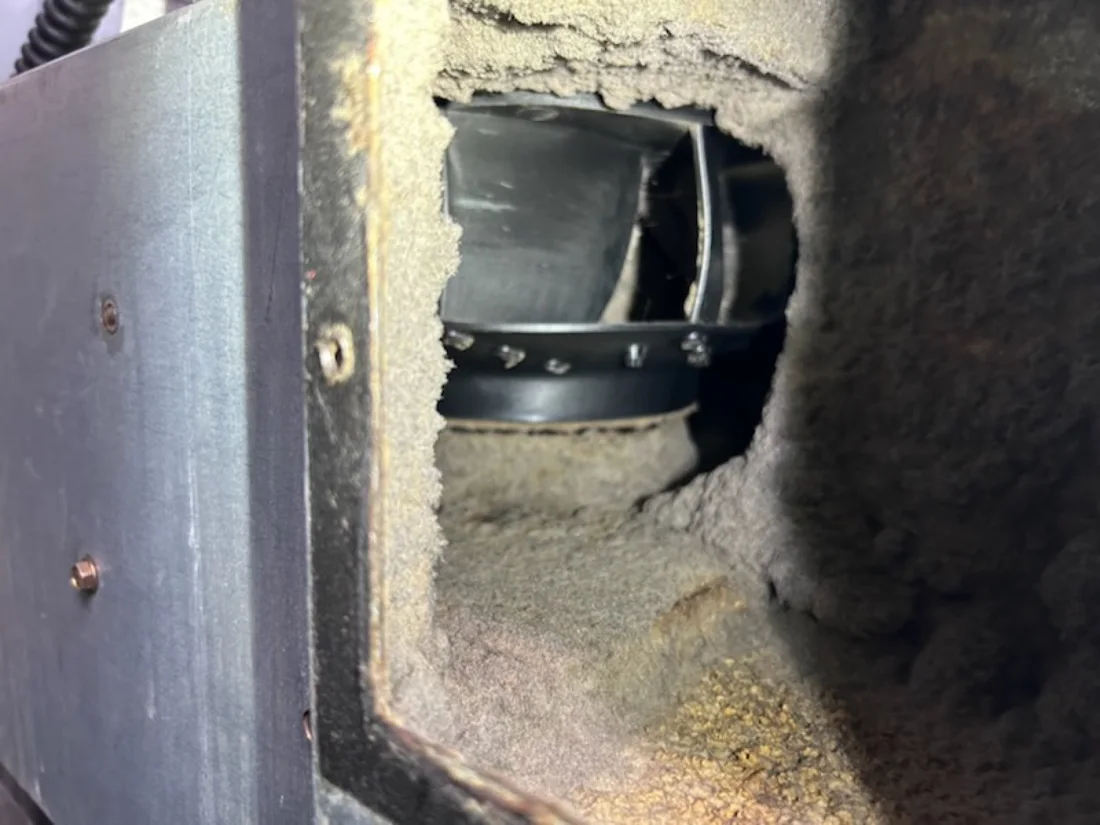
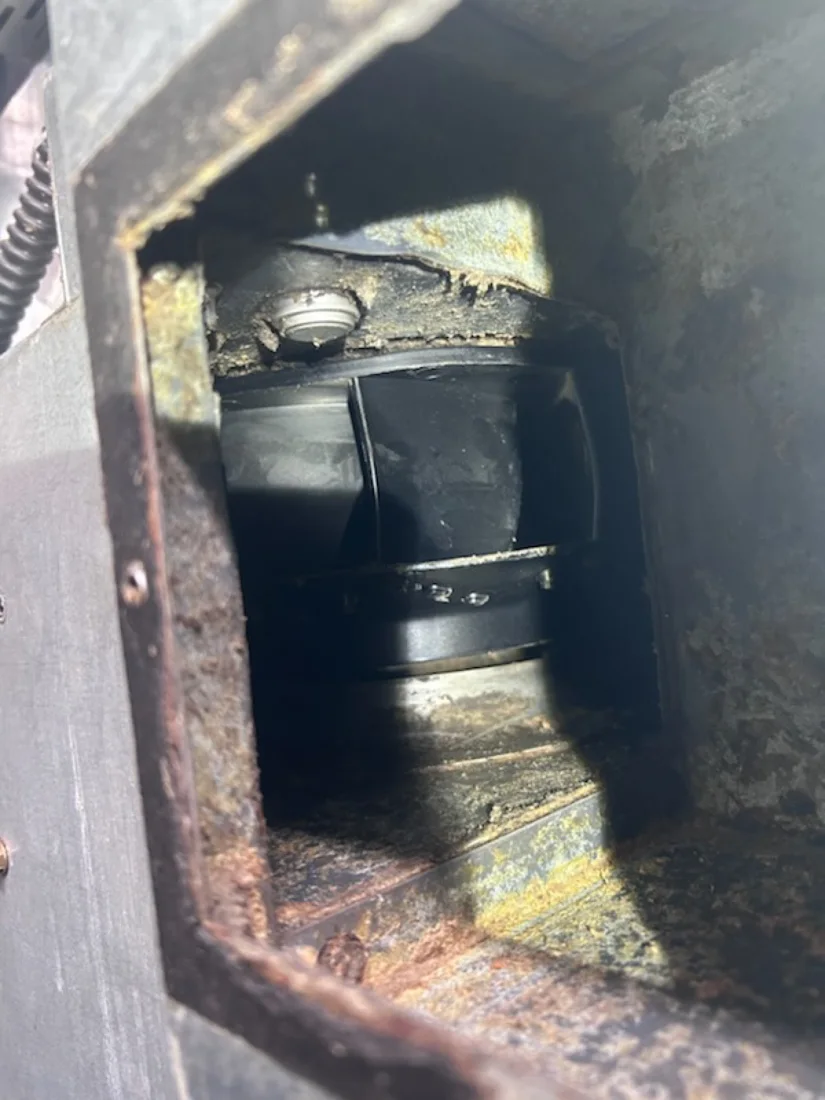
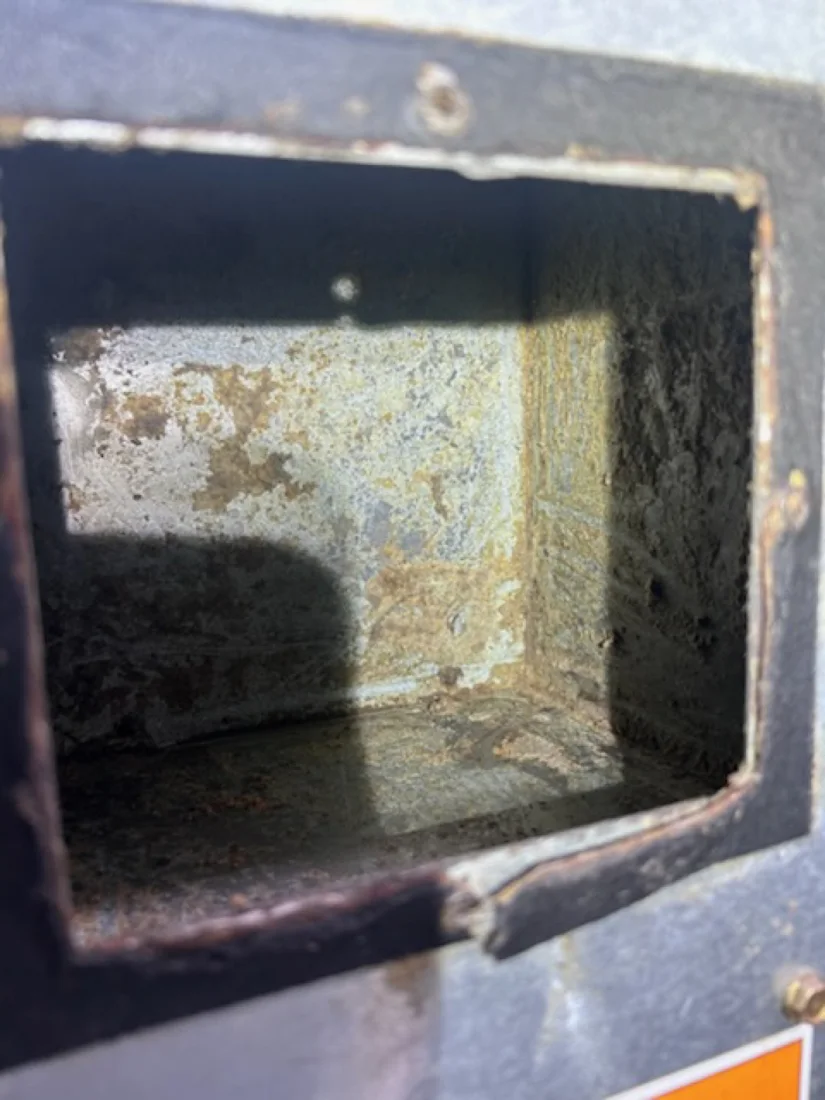
The blower (fan) wheel pulls hot air through the load and pushes it out the exhaust. Every bit of lint that gets past the lint screen ends up here. When the wheel, housing and exhaust opening load up, airflow drops, the airflow switch starts tripping, dry times climb and gas use goes up. Factory PM guides call for checking and cleaning this section regularly. Most owners never see it, because it sits behind panels at the back of the dryer.

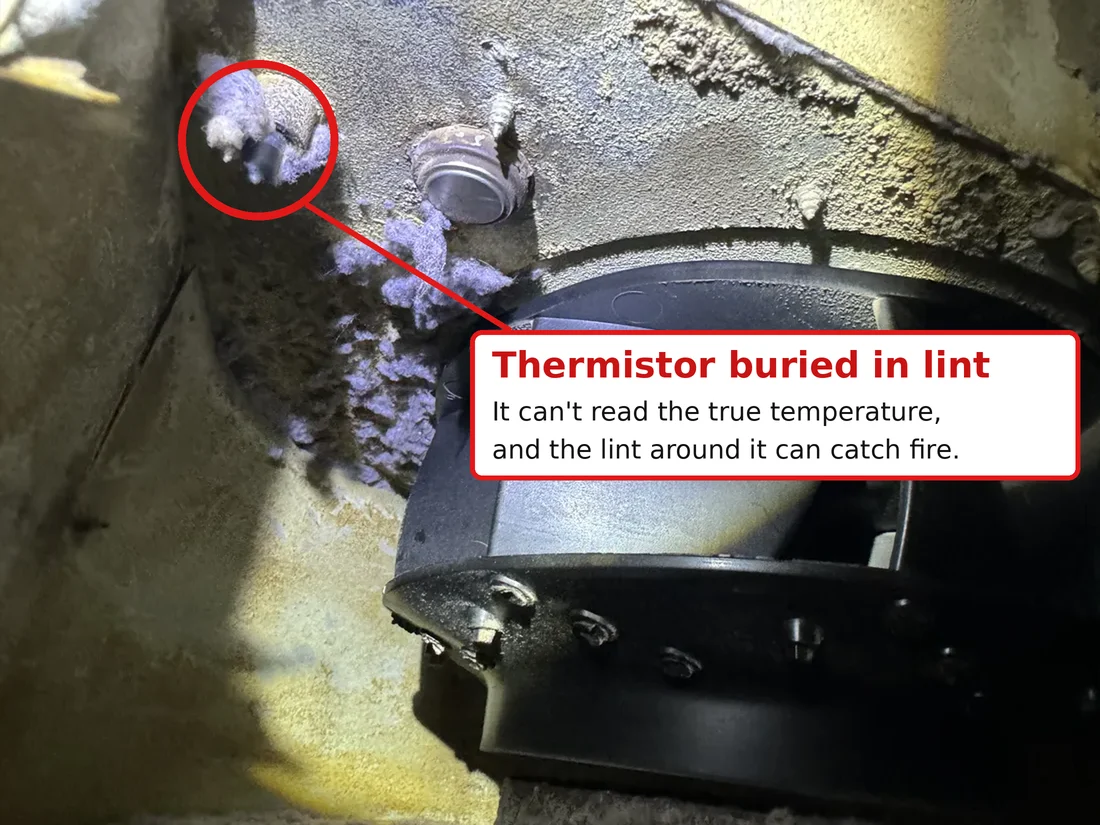
This is one of the most important parts of dryer PM. The blower housing also holds the temperature sensors that tell the control how hot the dryer is running. In the first photo, the thermistor (the small black sensor, circled in red) is buried in lint. A sensor wrapped in lint can't read the true temperature, and the lint packed around it sits in the hottest airflow in the machine. That is how lint fires start.

Dryer blower housing before cleaning, with the thermistor circled in red where it is buried in lint
Before
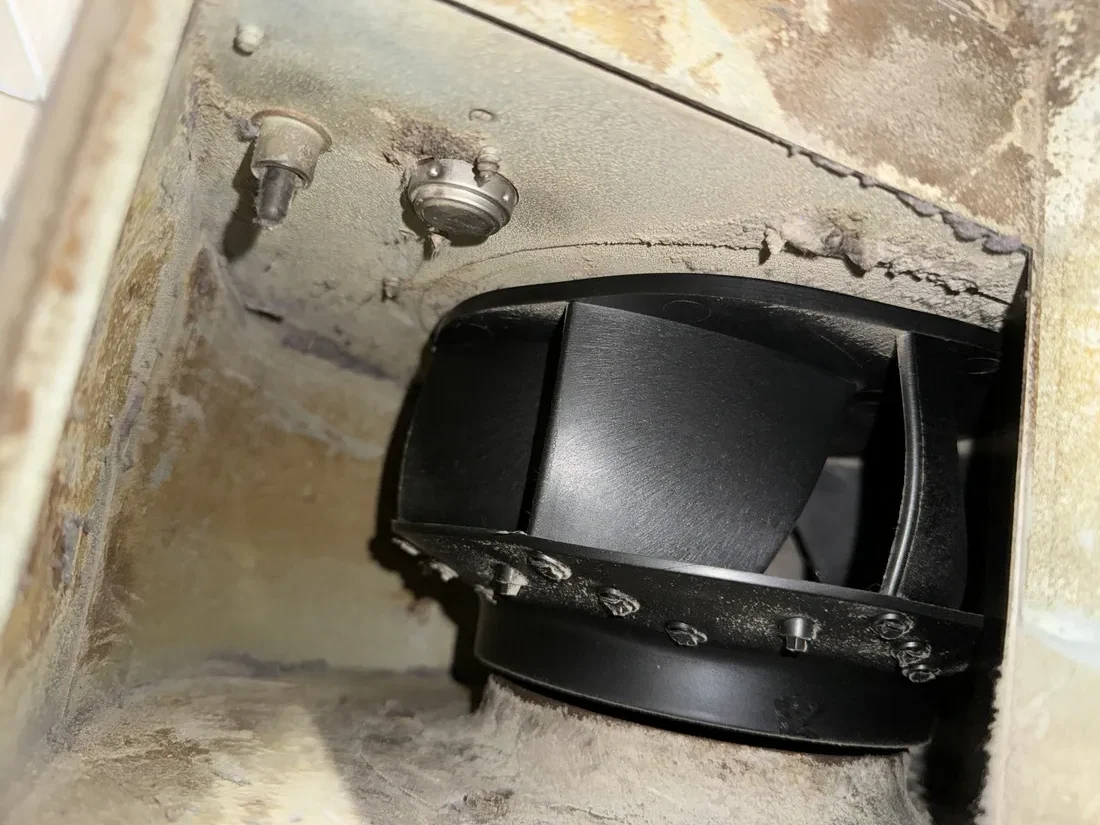
Same dryer blower housing after CLS removed the lint
After

Inside the blower housing of a working dryer, photographed without pulling the wheel. Before: lint around the wheel, the thermostat and the thermistor. After: the housing and sensors are clean.

Dryer blower compartment walls coated in a thick layer of lint
Before
Same blower compartment after CLS cleaned it
After

Blower compartment: the walls were coated so heavily that the lint layer was cracking. After cleaning, bare metal and a clear path to the wheel.

Dryer fan wheel half buried in lint inside its housing
Before
Same dryer fan wheel after the lint was removed
After

Fan wheel: half buried in lint, so it moves a fraction of the air it should. After cleaning, the full wheel is visible and free to move air.

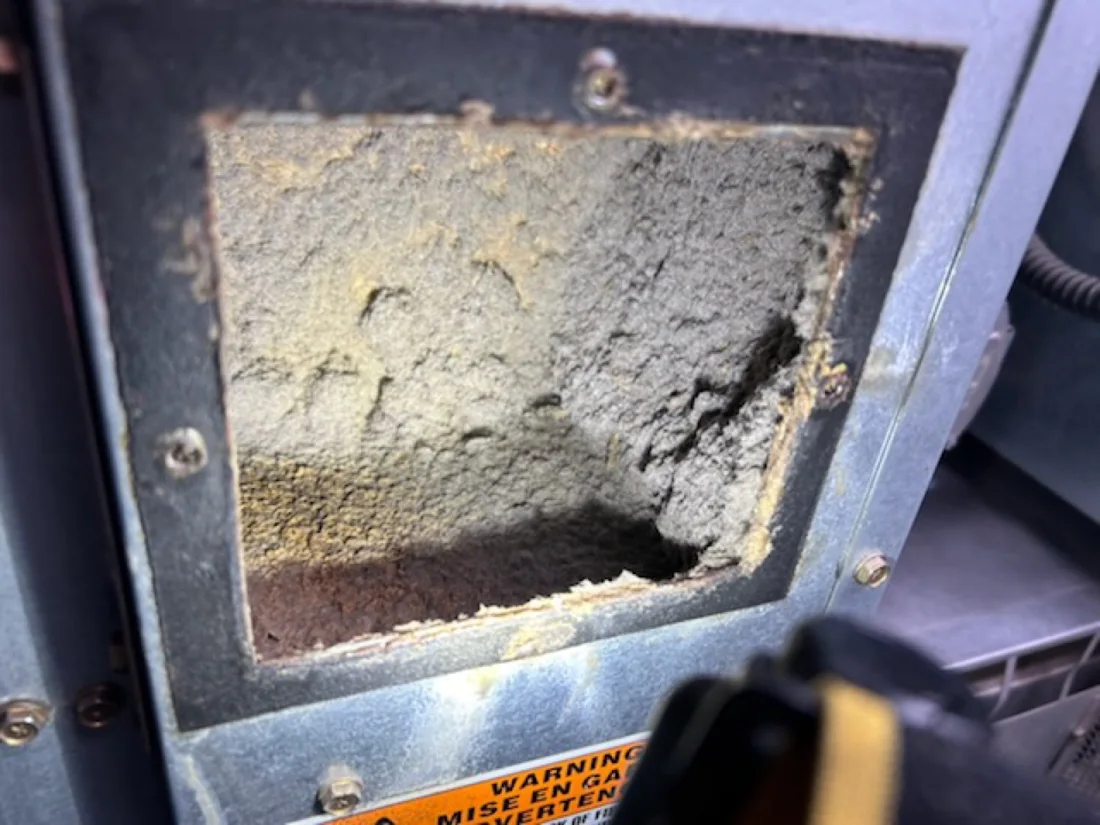
Dryer exhaust opening completely packed with lint
Before
Same dryer exhaust opening after cleaning
After

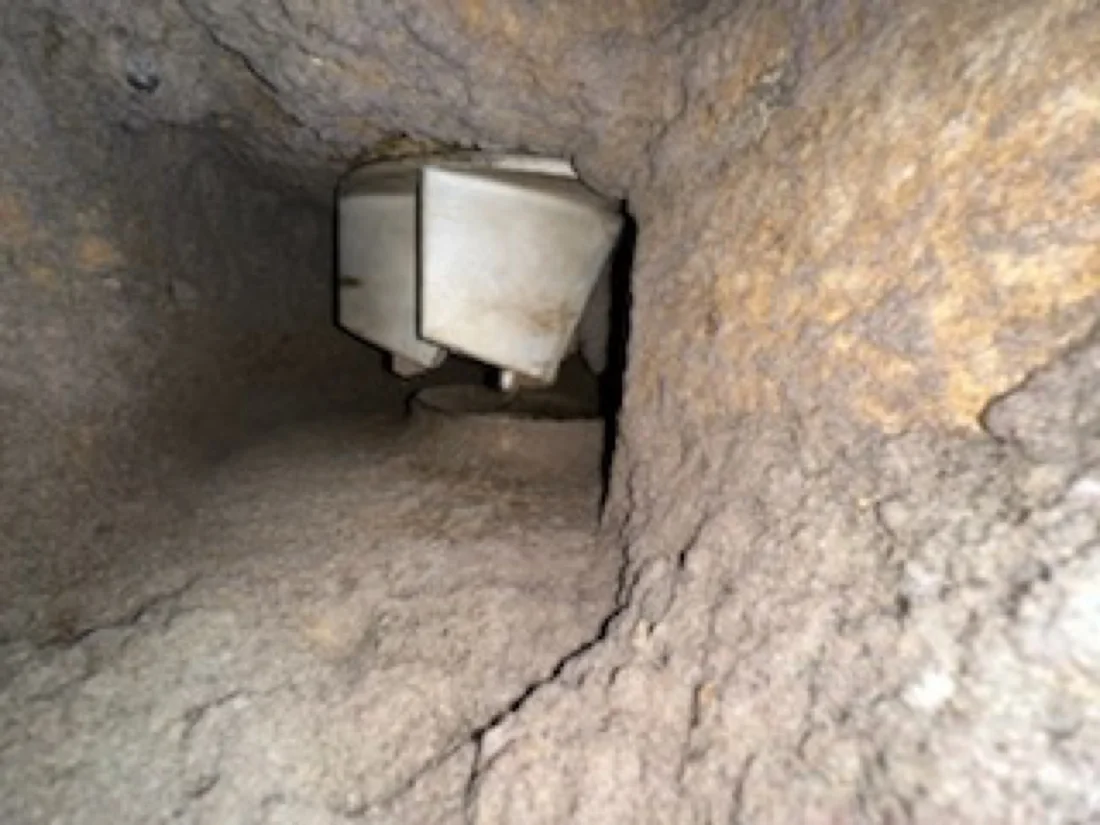
Exhaust opening: packed almost shut. Hot, moist air had nowhere to go, which means long dry times and an overheating cabinet.

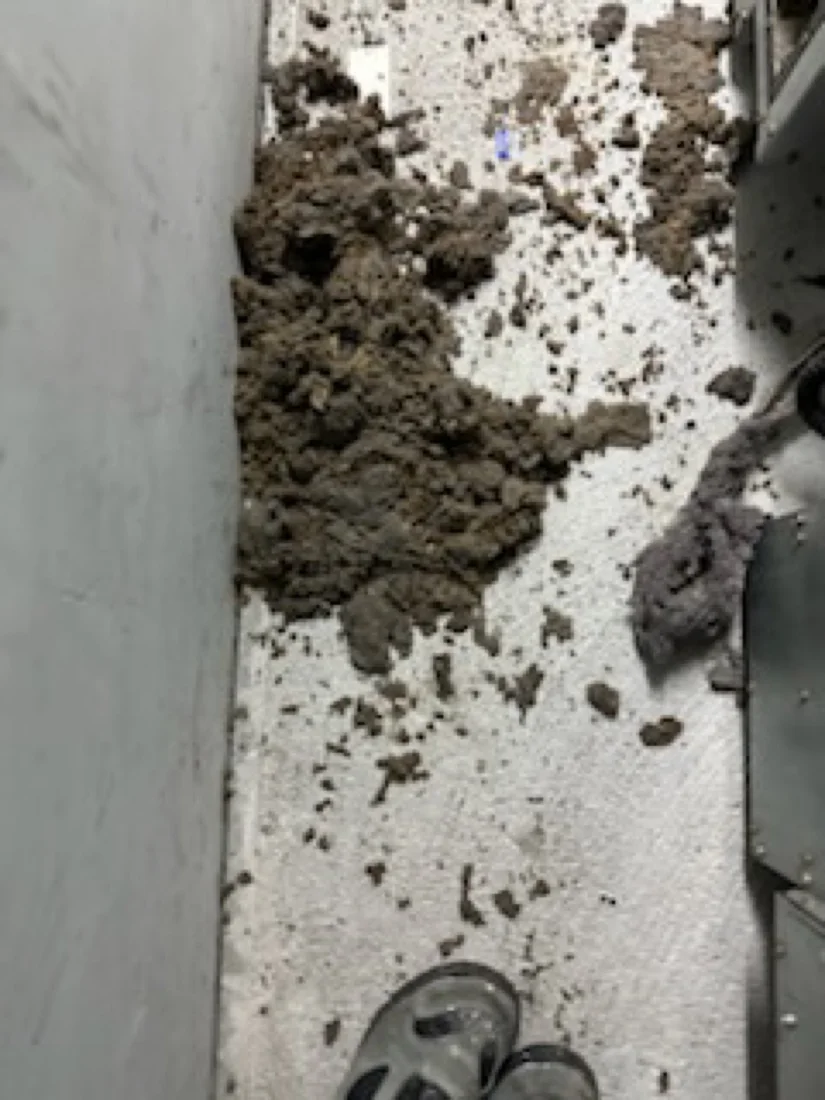
Pile of lint removed from a single dryer blower compartment during PM

The lint pile. What came out of one dryer's blower compartment during a single PM visit.

From the field

More cabinet cleanings

Every dryer below was cleaned with the cylinder out: cabinet, shrouds, rear panel and sensors. A quick vacuum through the lint door can't reach these areas.

  1. Heavy lint buildup inside a commercial dryer cabinet in a Queens laundromat
    Heavy buildupLint and debris across every panel in a busy laundromat dryer.
  2. Side-by-side before and after of a dryer cabinet cleaning
    Before / afterSame dryer, before and after a cylinder-out clean.
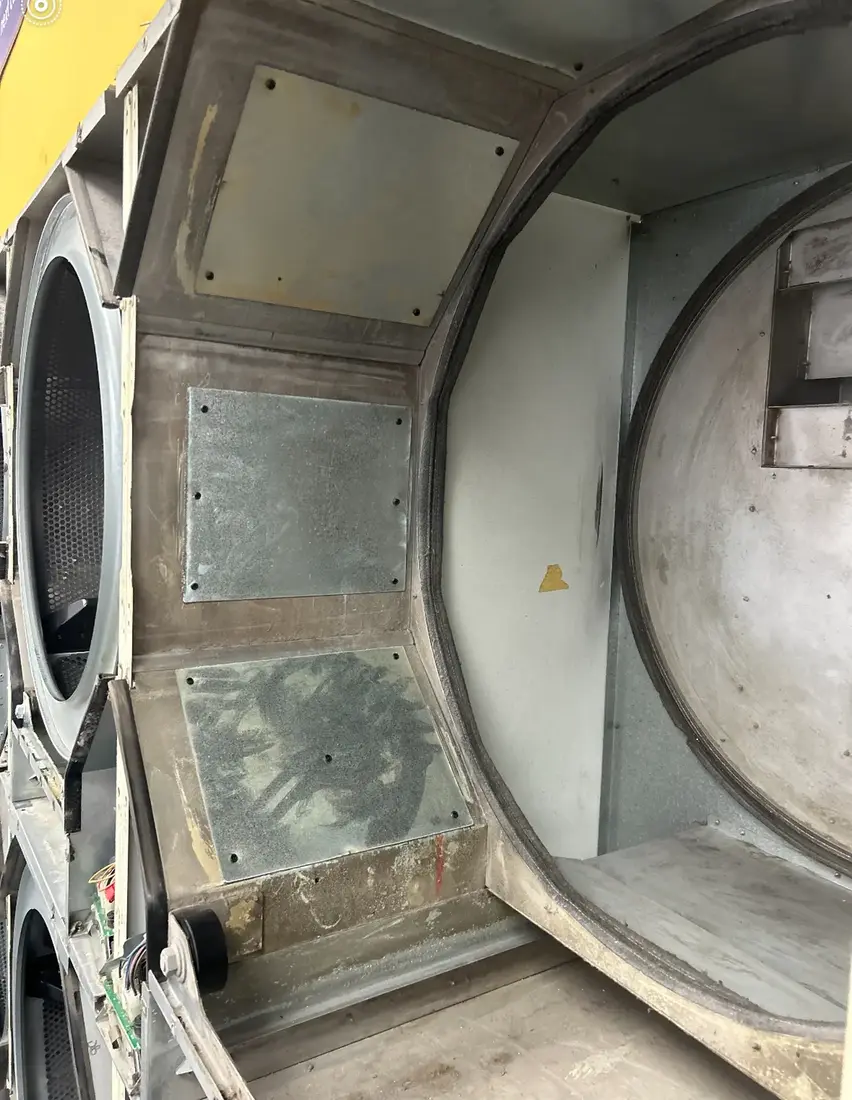
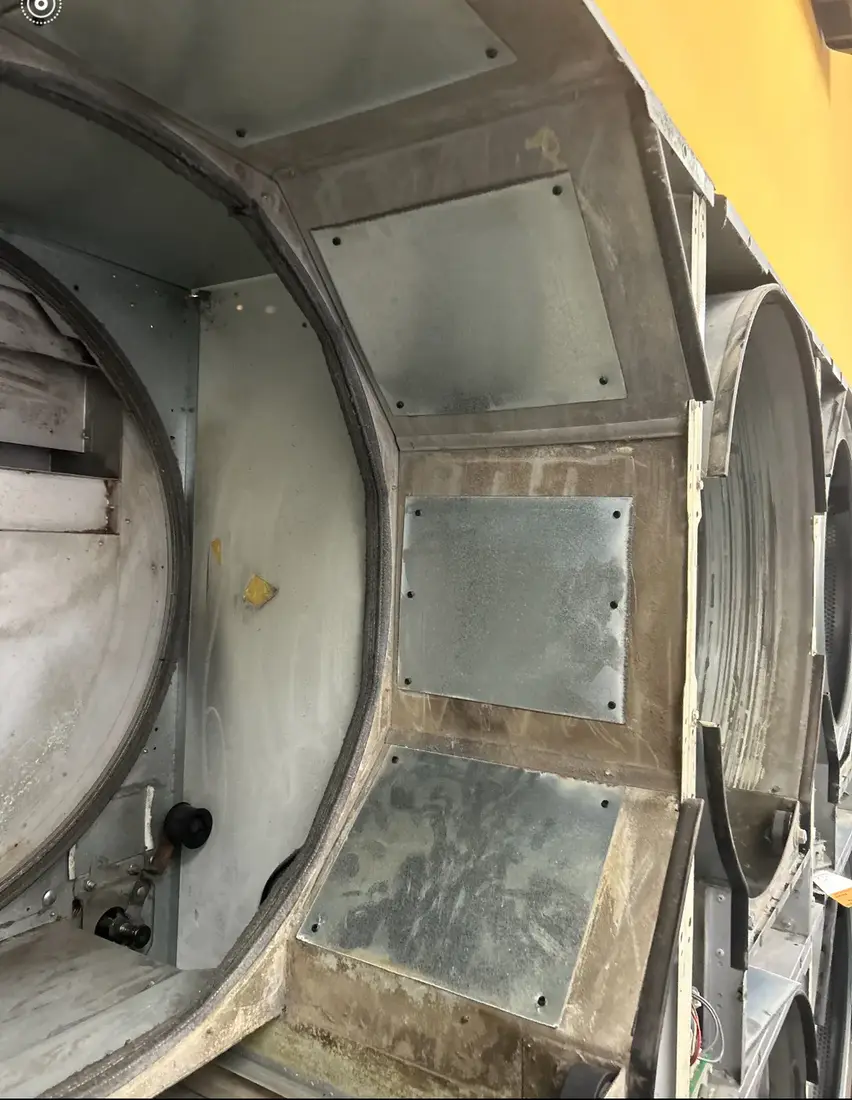
  3. Clean stack dryer cabinet, left side, after PM
    Stack dryer, leftStack dryer cabinet after cleaning, left side.
  4. Clean stack dryer cabinet, right side, after PM
    Stack dryer, rightSame stack dryer, right side.

Checklist

Commercial washer-extractor PM checklist

Based on the maintenance schedules in factory service manuals for front-load washer-extractors (Speed Queen, Huebsch, UniMac, Dexter, Wascomat, Continental Girbau and others). Intervals assume normal laundromat use. Heavy use means more frequent service.

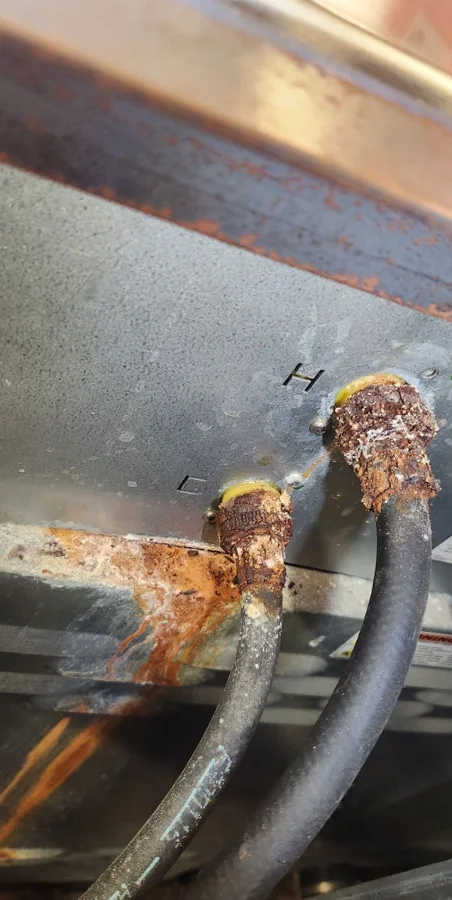
Corroded fittings and worn water hoses on a commercial washer, found during a washer PM
Found on PM
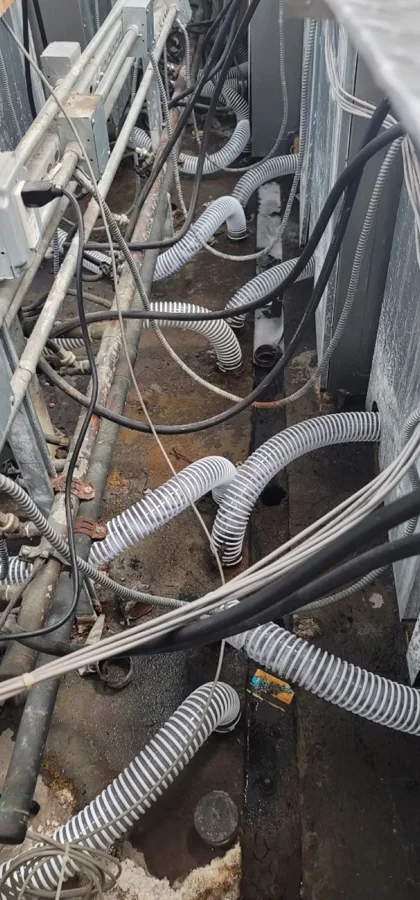
Drain hoses behind a bank of commercial washers, checked during PM
Drain hose check

Hoses are on the washer checklist for a reason. These fittings had corroded and the hoses had gone soft, a burst waiting to happen and a flooded floor. During washer PM we check every fill and drain hose and replace the worn ones before they fail.

Daily

Owner / attendant
  • Test the door interlock: with the door open the machine must not start, and the door must stay locked during a cycle
  • Look for water leaks at hoses, door and drain
  • Wipe the door gasket and glass; remove detergent and lint
  • Leave doors open after hours so the drum can dry

Weekly

Owner / attendant
  • Check for leaks while the machine fills and drains
  • Clean the drive (inverter) cooling filter on machines that have one
  • Check chemical supply lines on machines with automatic dosing
  • Clean the outside of the cabinet and the soap dispenser

Monthly

Technician
  • Belt condition, tension and pulley alignment
  • Fill hoses for bulges or cracks; most factories suggest replacing them about every five years
  • Clean the water inlet screens
  • Grease bearings on larger machines with grease fittings (typically 80 lb and up)
  • Motor mounting bolts, lint around the motor, electrical connections

Quarterly

Technician
  • Door hinge and lock hardware, lubricate where the factory calls for it
  • Anchor bolts and base: tighten loose bolts before they break
  • Bearing housing bolts torqued to spec
  • Test the out-of-balance / vibration switch
  • Drain valve, drain trough and pressure sensor hose

See an error on the display? Look it up in our commercial laundry error code library. Loose mounting bolts are behind many out-of-balance and vibration errors. We cover that under rebolting & reinstallation.

Checklist

Commercial tumble dryer PM checklist

Lint is the number one enemy of a commercial dryer. It cuts airflow, wastes gas and causes fires. These intervals follow the factory PM schedules for gas, steam and electric tumble dryers.

Daily

Owner / attendant
  • Clean the lint screen; on busy days, more than once
  • Clear lint from the lint compartment and the floor around and behind the dryers
  • Keep the area around the dryers clear of anything that can burn

Monthly

Technician
  • Check the exhaust duct and damper for lint and restrictions
  • Inspect the lint screen for holes or tears
  • Remove lint from the high-limit thermostat and temperature sensor
  • Check and clean the blower wheel

Quarterly

Technician
  • Clean motor cooling vents and fan
  • Check belts and pulleys
  • Make sure combustion air openings are not blocked
  • Test the fire suppression system on dryers that have one

Every 6 months

Technician
  • Check gas connections for leaks
  • Check electrical connections and wiring
  • Vacuum lint from behind the front panels and the burner area
  • Inspect cylinder seals for wear

Yearly

Technician
  • Pull the cylinder and deep clean the cabinet, shrouds and rear panel
  • Clean burner tubes and orifices
  • Replace worn cylinder seals and fire gaskets
  • Check drum bearings, idler and shaft hardware, tightened to factory torque

Between visits

What owners and attendants can safely do

Daily and weekly checks need no tools and catch most problems early. Anything inside the cabinet, on the gas train or behind a service panel should be done by a qualified technician with the power and gas off.

  • Clean lint screensEvery load is ideal, daily at minimum.
  • Watch dry timesIf a normal load needs an extra cycle, airflow is restricted.
  • Listen for noiseGrinding or rumbling in spin is often an early bearing warning.
  • Look for waterPuddles under a washer point to hoses, door boot or drain.
  • Note error codesWrite down the exact code before power-cycling the machine.
  • Leave doors openLets drums and gaskets dry overnight and prevents odors.

CLS sets up PM on a schedule that fits your store: weekly visits for busy laundromats, monthly or quarterly for laundry rooms and on-premise laundries. After every visit you get written findings and recommended repairs, and we keep a service history for each machine.

We work on Speed Queen, Huebsch, UniMac, Dexter, Wascomat, Electrolux, Continental Girbau, Ipso, Maytag, Primus and Fagor equipment.

Dryer cleaning service · Bearing replacement · Error code library

FAQ

Preventive maintenance questions

How often should commercial dryers be cleaned?

Clean the lint screen after every load or at least daily, clean the lint compartment and check the exhaust duct monthly, and have the inside of the cabinet, burner area and blower cleaned by a technician at least once or twice a year. Busy laundromats running dryers all day may need cabinet cleaning every quarter.

What is included in a commercial washer preventive maintenance visit?

A technician checks the door lock and interlock, door gasket, water hoses and inlet screens, drain valve, belts and pulley alignment, bearings and seals for leaks or noise, motor and mounting bolts, the out-of-balance switch, electrical connections and the drive (inverter) cooling, and lubricates the bearings on machines that need grease.

How often should washer bearings be greased?

Larger washer-extractors that have grease fittings, typically 80 lb capacity and up, are usually greased about once a month or every 200 operating hours with a small amount of NLGI #2 lithium grease. Over-greasing can push grease past the seals, so follow the amount listed for your model. Many smaller washers have sealed bearings that are not greased.

Why does my commercial dryer take so long to dry?

The most common causes are a clogged lint screen, lint packed inside the cabinet or blower wheel, a restricted or crushed exhaust duct, worn cylinder seals that let air bypass the load, or low gas pressure. A PM cleaning usually fixes the airflow causes.

What are cylinder seals and why do they matter?

Cylinder (drum) seals close the gap between the rotating drum and the front and rear panels of the dryer. When they wear out, hot air leaks around the drum instead of passing through the clothes, drying time goes up, and lint gets drawn into the cabinet where it can catch fire.

Do you offer PM contracts in New York?

Yes. Commercial Laundry Solutions sets up weekly, monthly or quarterly PM schedules for laundromats, on-premise laundries and apartment building laundry rooms across New York City, Long Island, Westchester and the surrounding area, and keeps a service record for every machine.

Checklists on this page are general guidance written by CLS from factory maintenance schedules. Always follow the manual for your exact model, and turn off power and gas before opening any panel.

Set up a PM schedule

Calls answered 24/7. Tell us how many washers and dryers you have and we'll recommend a schedule.